---
title: Dataset Versions
---
Use the Dataset versioning WebApp (UI) features for viewing, creating, modifying, and
deleting [Dataset versions](../dataset.md#dataset-versioning).
## Dataset Version History
The WebApp (UI) will present your dataset version structure in one of two ways, depending on the structure implemented.
## Simple View
While your dataset maintains a simple (linear) [version structure](../dataset.md#dataset-version-structure), the WebApp
(UI) will present the version history as a table of historic snapshots:
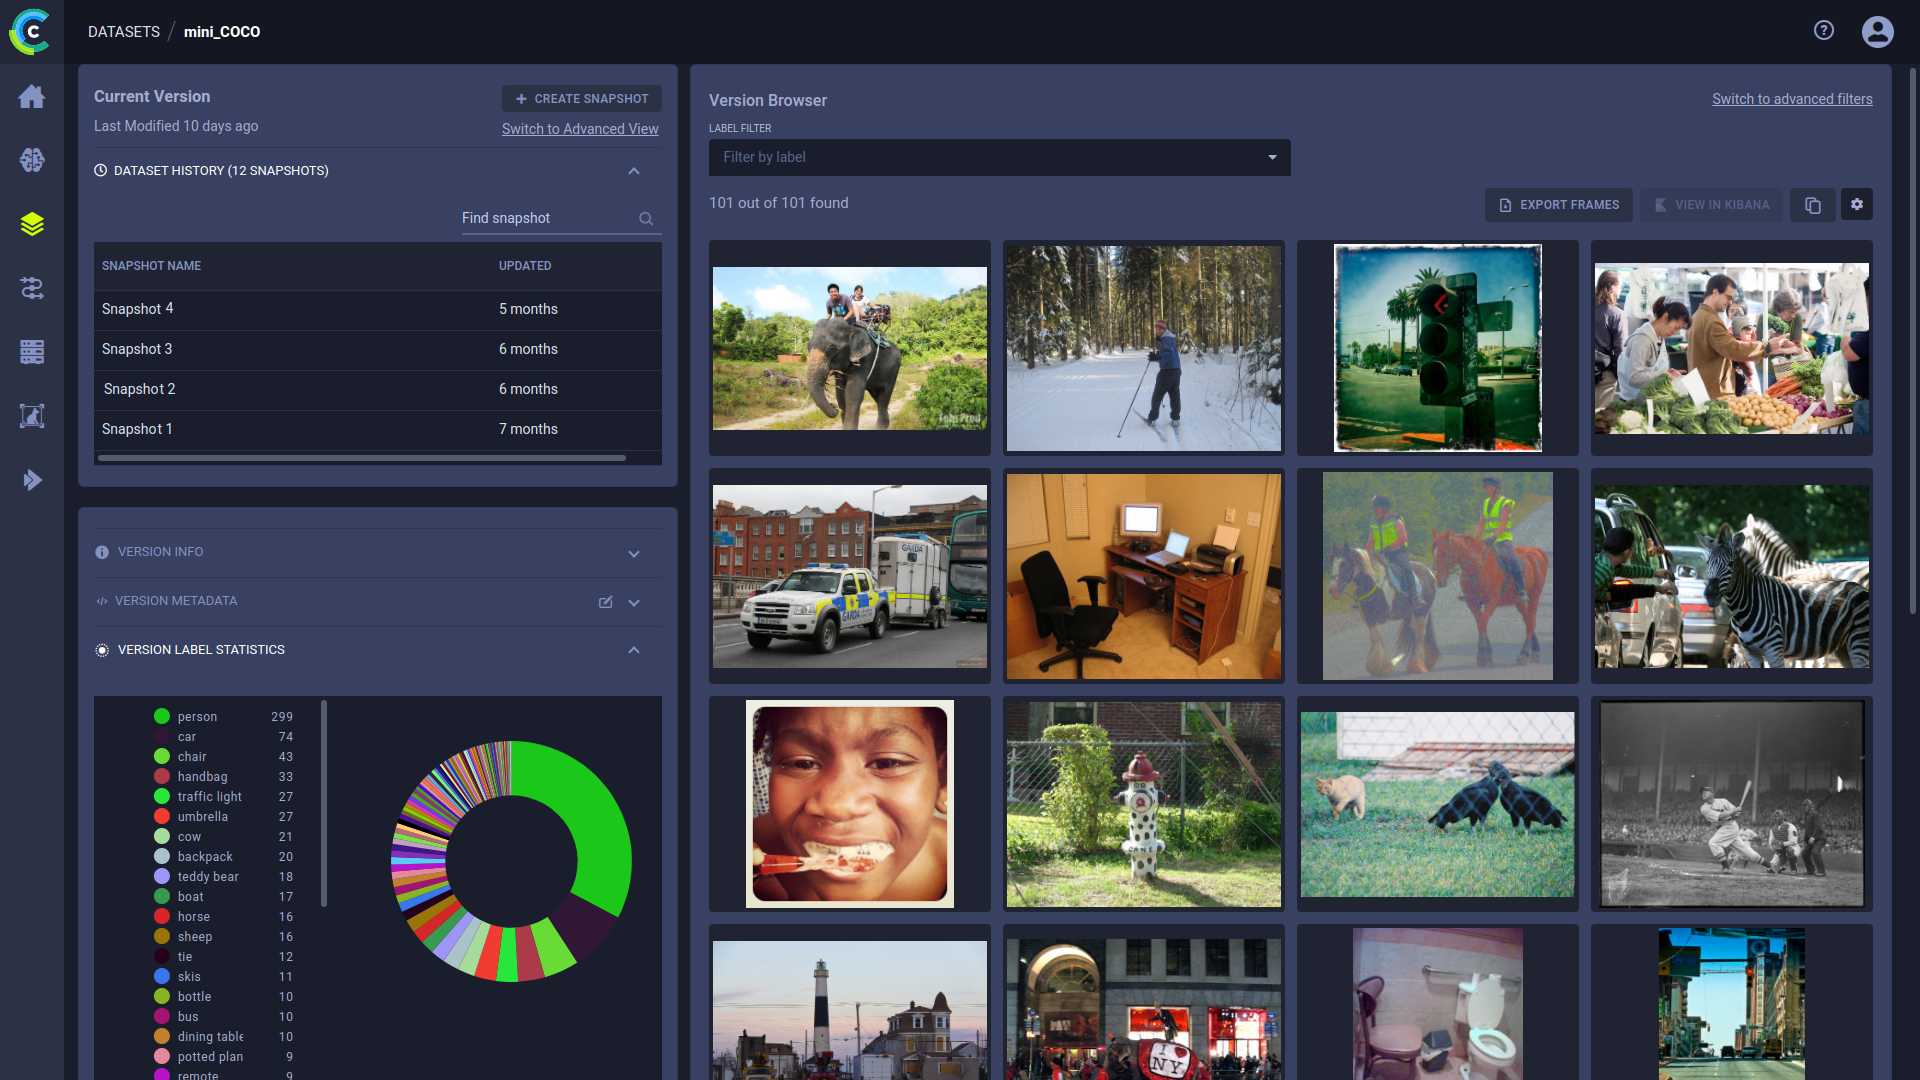
### Creating Snapshots
To create a snapshot, you must be in the simple (version table) view.
**To create a snapshot, do the following:**
1. Click **+ CREATE SNAPSHOT**.
1. Enter a version name, and optionally a description.
1. Click **CREATE**.
:::note VERSION BROWSING
Snapshots are always taken of the current version. If you are currently viewing a previous snapshot, click
**RETURN TO CURRENT VERSION** to make snapshot creation available.
:::
You can view your dataset’s explicit version structure and create a more complex structure by switching to the advanced
view.
### Modifying Snapshot Name
To modify a Dataset version name:
1. Click the snapshot name on the top left of the dataset page
1. Edit the name,
1. Click <img src="/docs/latest/icons/ico-save.svg" alt="check" className="icon size-md space-sm" /> (check).
## Advanced View
When employing a non-trivial [version structure](../dataset.md#dataset-version-structure) of your dataset, the WebApp
(UI) presents the version history as a tree of versions.
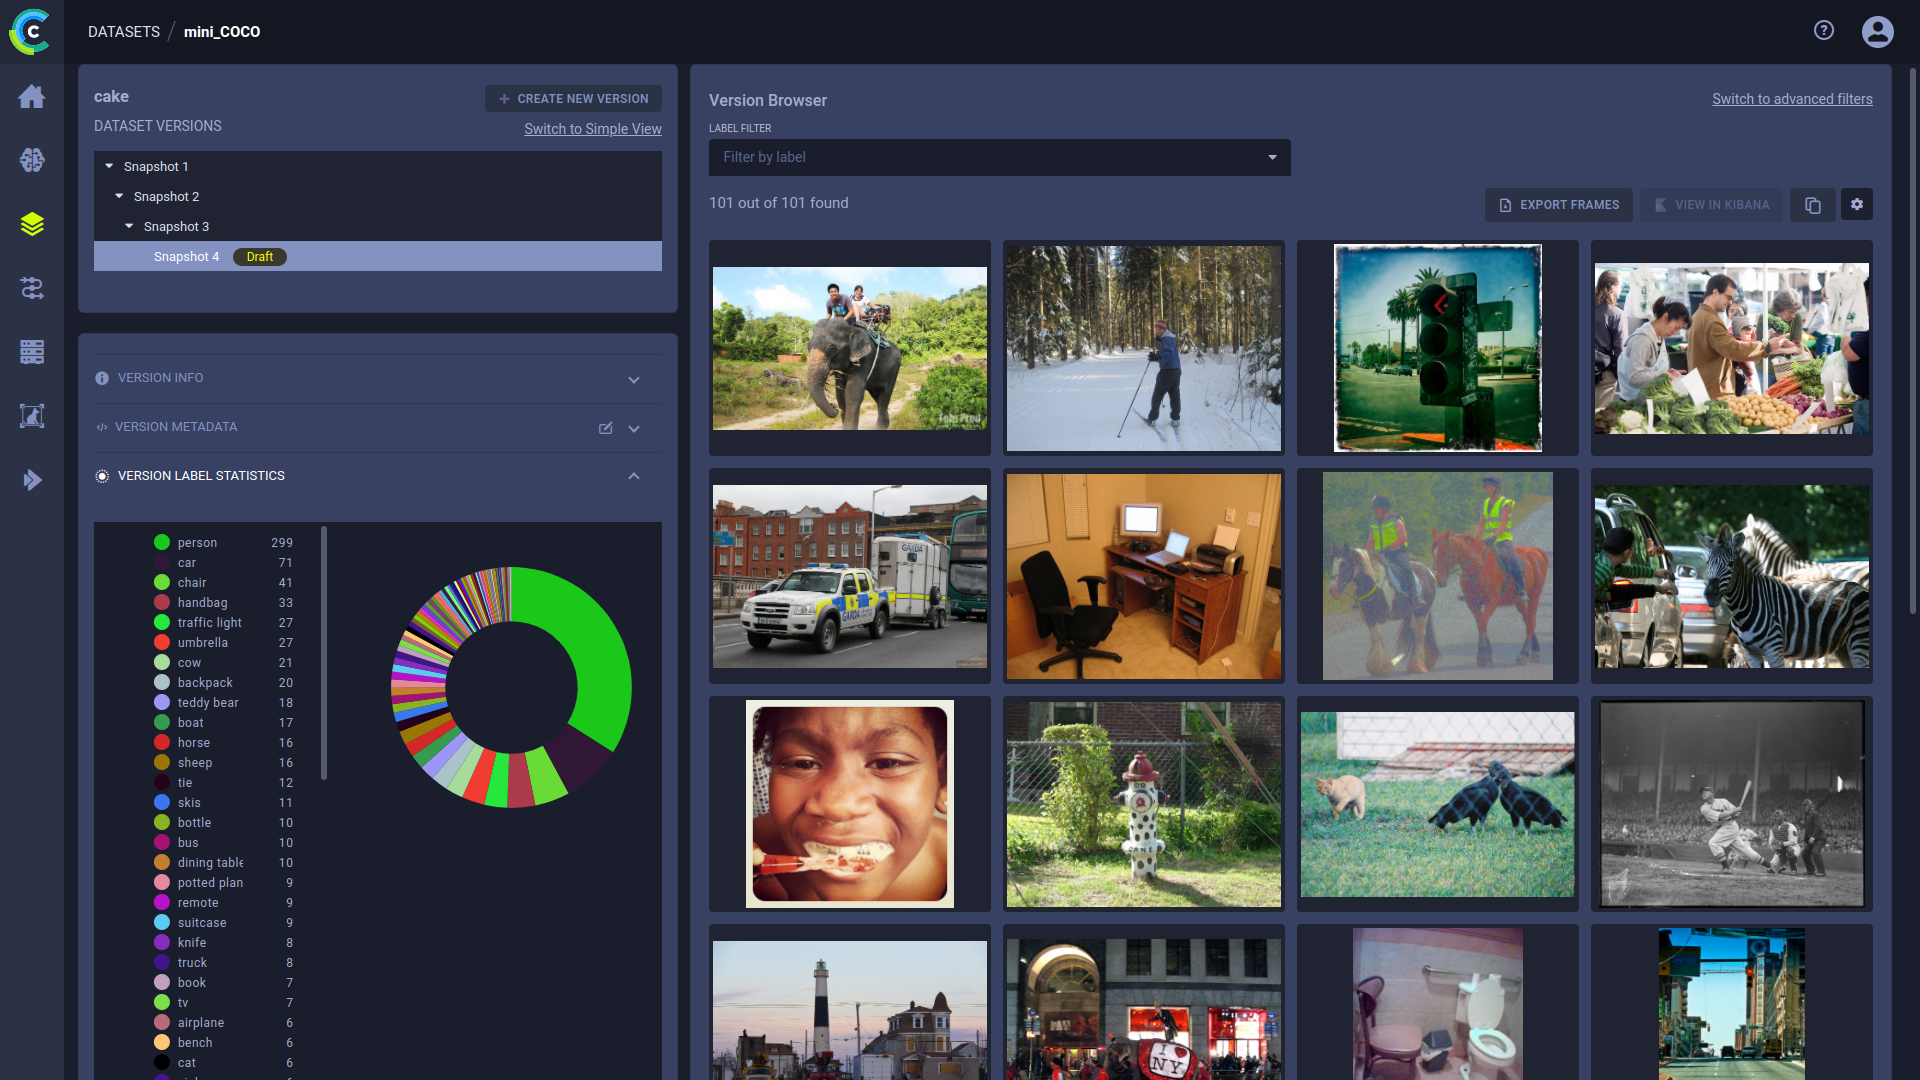
### Creating Versions
**To create a child version, do the following:**
1. Click the (parent) version from which to create a child (inherit all frames).
1. Click **+ CREATE NEW VERSION**.
1. Enter a version name, and optionally a description.
1. Click **CREATE**.
### Publishing Versions
Publish (make read-only) any Dataset version whose status is *Draft*. If you publish a dataset's current version, the
dataset's structure will no longer be considered a simple version structure.
**To publish a version, do the following:**
1. Click the version to publish.
1. Click **PUBLISH**.
1. Click **PUBLISH** again to confirm.
### Modifying Version Names
**To modify a Dataset version name:**
1. Click the dataset version name on the top left of the dataset page
1. Edit the name,
1. Click <img src="/docs/latest/icons/ico-save.svg" alt="check" className="icon size-md space-sm" /> (check).
### Deleting Versions
You can delete versions whose status is *Draft*.
1. Click the version to delete.
1. Click **DELETE**.
1. Click **DELETE** again to confirm.
## Version Information
Additional information about the selected dataset version is presented below the version selection panel in collapsible
panels:
### Version Info Panel
Provides general version information:
* Version ID
* Dataset ID
* Dataset name
* Status (*Draft* or *Published*)
* Creating user
* Version update time
* Version description.
**To modify a version description, do the following:**
1. Expand the **INFO** area
1. Hover over the **Description** element
1. Click <img src="/docs/latest/icons/ico-edit.svg" alt="Edit pencil" className="icon size-md space-sm" />
1. Edit the description
1. Click <img src="/docs/latest/icons/ico-save.svg" alt="Check mark" className="icon size-md space-sm" /> (check)
### Version Metadata Panel
Any version specific metadata, in JSON format.
The content icon color signifies whether any metadata is currently accompanying the dataset version.
**To edit a version's metadata:**
1. Click <img src="/docs/latest/icons/ico-metadata.svg" alt="Edit metadata" className="icon size-md space-sm" /> on the
**VERSION METADATA** panel to open the edit window
1. Edit the section contents (JSON format)
1. Click **OK**
### Version Label Statistics Panel
Label usage stats for this dataset version.
* Each label is listed along with the number of times it was used in the version
* The pie chart visualizes these stats. Hover over a chart slice and its associated label and usage
percentage will appear at the center of the chart.
## Version Frame Browser
The **Version Frame Browser** displays a preview of the contents of the selected dataset version.
The dataset version can be filtered by multiple criteria. The resulting frames can be exported as a JSON file.
To view further details about a specific frame, click on its preview, which will open the [Frame Viewer](webapp_datasets_frames.md#frame-viewer).
### Simple Frame Filtering
Simple frame filtering applies one annotation object (ROI) label and returns frames containing at least one annotation
with that label.
**To apply a simple frame filter,** select a label from the **LABEL FILTER** list.
<details className="cml-expansion-panel screenshot">
<summary className="cml-expansion-panel-summary">Simple filter example</summary>
<div className="cml-expansion-panel-content">
* Before filtering, the **Version Browser** in the image below contains seven frames.

* A simple label filter for `person` shows three frames, each containing at least one ROI labeled `person`.

</div>
</details>
### Advanced Frame Filtering
Advanced frame filtering applies sophisticated filtering logic, which is composed of as many frame filters as needed,
where each frame filter can be a combination of ROI, frame, and source rules.
* ROI rules use include and exclude logic to match frames by ROI label; an ROI label can match frames containing at least
one annotation object (ROI) with all labels in the rule.
* Frame rules and source rules use Lucene queries with AND, OR, and NOT logic. Frame rules apply to frame metadata.
* Source rules apply to frame source information.
**To apply advanced filters:**
1. In the **Version Browser**, click **Switch to advanced filters**.
1. In a **FRAME FILTER**, create one of the following rules:
* ROI rule
* Choose **Include** or **Exclude**, select ROI labels, and optionally set the confidence level range.
* To switch from the ROI dropdown list to a Lucene query mode, click <img src="/docs/latest/icons/ico-edit.svg" alt="Setting Gear" className="icon size-md space-sm" />.
* Frame rule - Enter a Lucene query using frame metadata fields in the format `meta.<key>:<value>`.
* Source rule - Enter a Lucene query using frame metadata fields in the format `sources.<key>:<value>`.
#### Filtering Examples
<details className="cml-expansion-panel screenshot">
<summary className="cml-expansion-panel-summary">ROI Rules</summary>
<div className="cml-expansion-panel-content">
* Create one ROI rule for `person` shows the same three frames as the simple frame filter (above).

* In the ROI rule, add a second label. Add `partially_occluded`. Only frames containing at least one ROI labeled as both
`person` and `partially_occluded` match the filter.

* By opening a frame in the frame viewer, you can see an ROI labeled with both.

</div>
</details>
<br/>
<details className="cml-expansion-panel screenshot">
<summary className="cml-expansion-panel-summary">Frame Rules</summary>
<div className="cml-expansion-panel-content">
Filter by metadata using Lucene queries.
* Add a frame rule to filter by the metadata key `dangerous` for the value of `no`.

* Open a frame in the frame viewer to see its metadata.

</div>
</details>
<br/>
<details className="cml-expansion-panel screenshot">
<summary className="cml-expansion-panel-summary">Source Rules</summary>
<div className="cml-expansion-panel-content">
Filter by sources using Lucene queries.
* Add a source rule to filter for sources URIs with a wildcards.

Lucene queries can also be used in ROI label filters and frame rules.
</div>
</details>
### Exporting Frames
To export (download) filtered datasets as a JSON file, click **EXPORT FRAMES**.
### Frame Browser Configuration
Click <img src="/docs/latest/icons/ico-settings.svg" alt="Setting Gear" className="icon size-md" /> to open the
frame browser configuration settings.
#### Grouping Previews
FrameGroups or SingleFrames can share the same `context_id` (URL). For example, users can set the same `context_id`
to multiple FrameGroups that represent frames in a single video.
Use the **Grouping** menu to select one of the following options:
* Split Preview - Show separate previews for each individual FrameGroup, regardless of shared context.
* Group by URL - Show a single preview for all FrameGroups with the same context
#### Preview Source
When using multi-source FrameGroups, users can choose which of the FrameGroups’ sources will be displayed as the preview.
Select a source from the **PREVIEW SOURCE** menu.
Choose the `Default preview source` option to present the first available source.
:::note Unavailable Source
If a FrameGroup doesn't have the selected preview source, the preview displays the "Source not available" message.
:::